
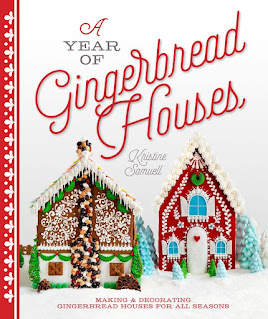
Decorating a gingerbread house at Christmas time has become a tradition in our home. Normally we buy a kit with the gingerbread shapes already baked and ready for assembly. This year, for the first time, we decided to make the entire gingerbread house from scratch! We were inspired by a book we came across in the library, A Year of Gingerbread Houses by Kristine Samuell.
It wasn't nearly as difficult as we thought it might be to do the entire thing ourselves. The three main difficulties in making a gingerbread house from scratch are: 1) Finding inspiration for the design of the house; 2) Being patient enough to wait for the house to finish baking; and 3) Using caution when assembling the house, by allowing adequate drying time for each phase of assembly.
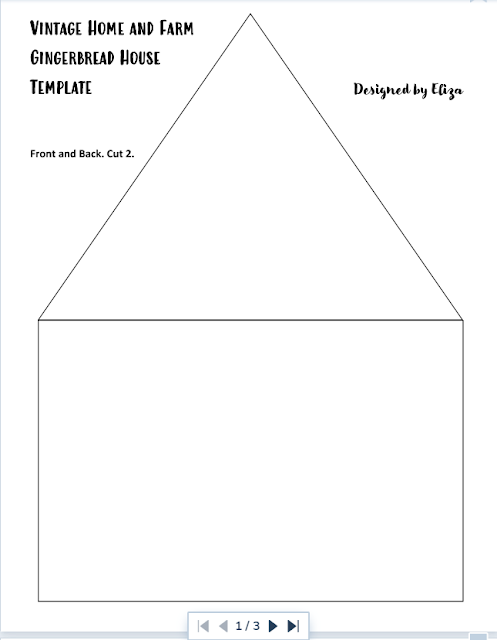
As for the first challenge, our daughter Elizabeth provided the inspiration for the house. We decided to create the design on the computer, using Microsoft Word to insert shapes (squares and triangles) to create the front, sides and roof of the house. Without her math skills, our house would have had a roof that was too small (thanks to me!). I had suggested that the height of the roof would be the same as the height of the front, measuring from the middle of the front and going up. Of course, that was wrong. "That's not how the Pythagorean Theorem works, mom," Elizabeth pointed out. Then she demonstrated why my idea doesn't work. Grabbing control of the computer mouse, she dragged our roof rectangle over to the front of the house, then swiveled the shape on screen so that it tilted sideways. That's when I realized the roof piece would have come out more than an inch short if I'd designed it! She enlarged the roof shape, then dragged it to a blank part on the page. Before I knew it, she'd printed our design and we were ready to begin making the gingerbread!

Here's the PDF of our Gingerbread House Design, in case you'd like to make one, too!
For the gingerbread batter, we used one of the recipes in A Year of Gingerbread Houses, which is similar in nature to many other recipes you can find online. Just note that gingerbread for constructing a house is different from gingerbread that you would eat, as in order to use it for construction it needs to become very hard. This leads us to Challenge #2, baking gingerbread long enough to harden it without burning it. We found that we needed to bake it an extra half-hour, and to prevent burning we lowered the oven temperature to 200 degrees Fahrenheit. The lower temperature kept the gingerbread from burning. And, let me tell you, the house smelled absolutely divine during the baking time and for several hours afterward! We played Christmas music while enjoying the sweet, spicy aroma of gingerbread that is so reminiscent of the holidays. If you aren't making your gingerbread houses from scratch, you are missing out on one of the greatest joys of the experience.


The tradition of decorating the house came next. For this task, we needed to make Royal Icing, which I had never made from scratch before. We chose to make it using meringue powder, which was kind of difficult to find, but I finally came across it in the wedding baking aisle at Jo-Ann Fabrics. Royal Icing is another common recipe available all over the internet, but in our case, we used the recipe in A Year of Gingerbread Houses. The reason we used a recipe that contained meringue is because we wanted to taste the icing (yep, I never grew up...still love licking the batter off the spoon!). The alternative to meringue powder is to use egg whites, but eating raw egg isn't safe.
We separated the Royal Icing into three bowls so that we could use gel food coloring to make red icing and green icing. The last bowl remained white icing. Then we divided the pieces between the two of us and got to work. We actually decorated each of the pieces before we assembled the house. Doing it that way meant we could lay the pieces flat and decorate them, rather than trying to decorate a house that's already constructed. This made the process of decorating a lot easier.
Finally, once our decorated pieces had dried, the last step in making our house was to assemble it. Here's where a final challenge was encountered. Patience was once again required. We needed to wait for the Royal Icing "glue" to dry on the partly-assembled house. We assembled all of the wall pieces first, then once the icing holding those pieces had dried, as a final step we glued the roof on with the Royal Icing.


Once the house was fully constructed, we added a little more decoration, covering up joint seams on the roof with red Royal Icing.
From start to finish and with wait time included, it took us a couple days to make our gingerbread house. It was a longer commitment of time for a holiday project, but we thoroughly enjoyed the process and are pleased with the results.
Comments
Post a Comment
Thank you so much for submitting a comment! All comments are reviewed by our moderator before being posted to the blog, in an effort to help control spam.